Back to Tech Info
Hand Crank Generator G42A/PT
NSN: 5805-00-542-1469
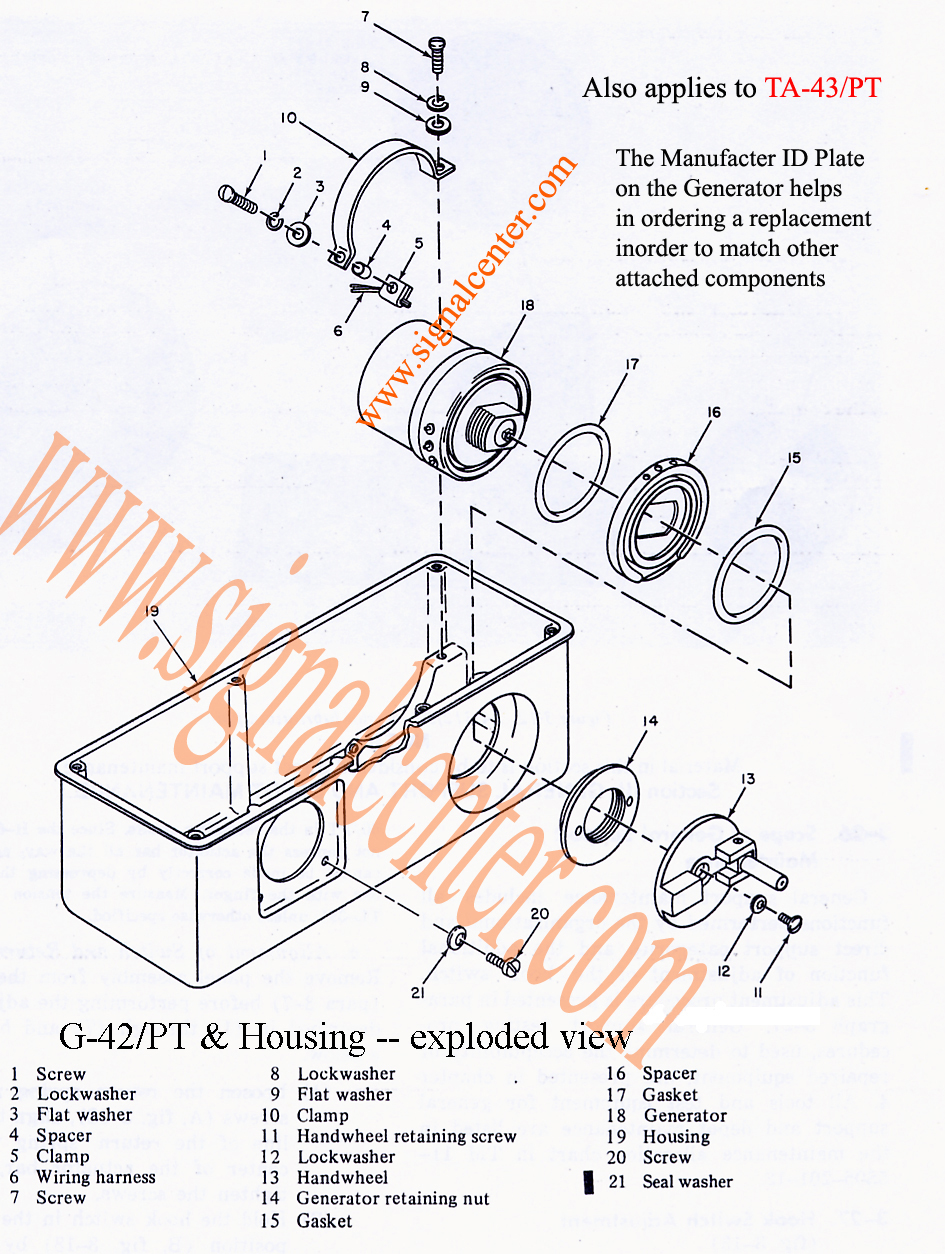
Removing the Generator:
The Generator is secured by a clamp-band (see item #10)inside the housing unit (see item # 19) and the round Generator Retaining Nut with two holes (See item #14)outside the housing. A frequent question is: What direction do you unscrew the front Generator Retaining Nut (see #14)? Twist or unscrew COUNTER-Clockwise with a Needle Nose Pliers. When you encounter a stubborn retaining nut, use a thin Phillips Screw Driver to loosen it by inserting the tip of the screw driver in one hole and gently tapping it Counter-Clockwise with a small hammer until the retaining nut is loose, then continue unscrewing with the Needle Nose Pliers. A more convenient tool for this would be a right-angle 90-degrees bent Needle Nose pliers.
If you are replacing it with a "pull" or used generator, ask the seller to not unsolder at the three contact points, but to just cut the wires about an inch above the contacts. Then all you will have to do is use conduit sleeves to connect the wires, matching the color codes on the existing wires. The TA-312/PT Technical Manual (TM) recommends using a wrench 6R55310.1 tool; I have no idea where to get this tool.
Important: Before cranking the Generator, some of the older TA-312/PT versions require that the Handset H-60/PT is cradled, thus activating the hook switch and allowing the Signal Current from the Generator to flow through. You can also just push down with your finger on the hook switch and hold, then crank the generator.
Parts listed below on this diagram are for the TA-312/PT, TA-43/PT and the TA-312A/PT. When ordering please refer to the the corresponding part number next to the part.
G-42A/PT hand generator for the TA-312/PT, TA-43/PT, and the TA-312A/PT Field Telephones